interface InputProps {
label: string;
name: string;
kind?: "text" | "phone" | "price"; //세가지 종류의 인풋
[key: string]: any; //input에 원하는 prop을 전달하고 싶을 때
}

export default function Input({
label,
name,
kind = "text",
...rest
}: InputProps) {
return (
<div>
<label
className="mb-1 block text-sm font-medium text-gray-700"
htmlFor={name}
>
{label}
</label>
{kind === "text" ? (
<div className="rounded-md relative flex items-center shadow-sm">
<input
id={name}
{...rest}
className="appearance-none w-full px-3 py-2 border border-gray-300 rounded-md shadow-sm placeholder-gray-400 focus:outline-none focus:ring-orange-500 focus:border-orange-500"
/>
</div>
) : null}
{kind === "price" ? (
<div className="rounded-md relative flex items-center shadow-sm">
<div className="absolute left-0 pointer-events-none pl-3 flex items-center justify-center">
<span className="text-gray-500 text-sm">$</span>
</div>
<input
id={name}
{...rest}
className="appearance-none pl-7 w-full px-3 py-2 border border-gray-300 rounded-md shadow-sm placeholder-gray-400 focus:outline-none focus:ring-orange-500 focus:border-orange-500"
/>
<div className="absolute right-0 pointer-events-none pr-3 flex items-center">
<span className="text-gray-500">KRW</span>
</div>
</div>
) : null}
{kind === "phone" ? (
<div className="flex rounded-md shadow-sm">
<span className="flex items-center justify-center px-3 rounded-l-md border border-r-0 border-gray-300 bg-gray-50 text-gray-500 select-none text-sm">
+82
</span>
<input
id={name}
{...rest}
className="appearance-none w-full px-3 py-2 border border-gray-300 rounded-md rounded-l-none shadow-sm placeholder-gray-400 focus:outline-none focus:ring-orange-500 focus:border-orange-500"
/>
</div>
) : null}
</div>
);
}
https://www.prisma.io/docs/concepts/overview/what-is-prisma
# Prisma
1. Node.js and Typescript ORM(Object Relational Mapping)
=> JS or TS 와 데이터베이스 사이에 다리를 놓아줌 (기본적으로 번역기의 역할을 한다고 생각하면 됨)
2. Prisma를 사용하기 위해서는 먼저 Prisma에게 DB가 어떻게 생겼는지, 데이터의 모양을 설명해줘야 함 => schema.prisma
3. Prisma가 이런 타입에 관한 정보를 알고 있으면 client를 생성해줄 수 있음. client를 이용하면 TS로 DB와 직접 상호작용 가능, 자동완성 제공.
4. Prisma Studio : Visual Database Browser, DB를 위한 관리자 패널같은 것.
prisma extension
npm i prisma -D
npx prisma init //호출
prisma 폴더와, .env 파일이 생성됨
.env파일에 제대로 된 DATABASE URL을 연결
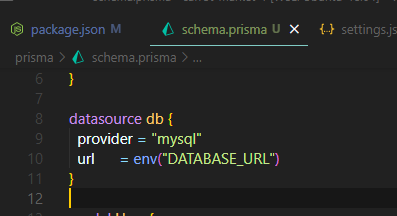
schema.prisma에 provider를 설정(이 프로젝트에서는 mySQL을 사용)
database에 사용될 model 생성
schema.prisma
```jsx
model User {
id Int @id @default(autoincrement())
phone Int? @unique
email String? @unique
name String
avatar String?
createdAt DateTime @default(now())
updatedAt DateTime @updatedAt
}
```
prisma formattor 적용 안될 때
vscode setting.json에 들어가서
{
"[prisma]": {
"editor.defaultFormatter": "Prisma.prisma",
"editor.formatOnSave": true
}
}
PlanetScale
MySQL과 호환되는 Serverless 데이터베이스 플랫폼
https://planetscale.com/
database platform //dataase제공해준다
serverless //서버가 없다는 뜻 x 서버를 우리가 유지 할 필요가 없다.
scaling을 자동으로 해줌 ( + no vacumming, no rebalencing, no query planning, no downtime)
Vitess
Vitess는 MySQL을 스케일링하기 위한 데이터베이스 클러스터링 시스템
인터넷에서 가장 큰 사이트를 호스팅하는 강력한 오픈 소스 기술입니다.
https://vitess.io/
Vitess를 사용하는 이유
1. 수평 스케일
2. 고가용성 (Vitess의 기본 복제본 구성은 예기치 않은 이벤트가 발생할 때 기본에서 복제본으로 원활한 장애 조치를 허용합니다.)
3. MySQL 호환
4. 쿠버네티스 네이티브
5. 구체화된 뷰
6. 온라인 스키마 마이그레이션
PlanetScale: The world’s most advanced database platform
PlanetScale is the MySQL-compatible, serverless database platform.
planetscale.com
## PlanetScale
CLI를 통해 쉽게 데이터베이스를 다룰 수 있음
마치 Git처럼 메인 데이터베이스 이외에 Branch 데이터베이스를 사용할 수도 있음
이후 Merge를 하면 자동으로 배포가 됨
WSL 사용하시는 분
1. https://github.com/planetscale/cli#linux 접속
2. releases를 클릭하여 해당 링크에 접속
3. pscale_0.93.0_linux_amd64.deb 다운(ubuntu를 사용중인 경우)
4. 다운로드된 경로로 이동하여 $ sudo dpkg --install pscale_0.93.0_linux_amd64.deb
5. $ pscale 로 잘 설치됐는지 확인
PlanetScale CLI
pscale 커맨드 라인을 사용하면 branch, deploy 요청 및 기타 PlanetScale 개념을 손쉽게 사용할 수 있습니다.
https://github.com/planetscale/cli
pscale 오류 : .config/planetscale
You should type 'pscale auth login' in the terminal you installed planetscale(in the same directory as where the deb file is located)
After that, If you encounter '.config/planetscale' issue, type the command below. mkdir -p ~/.config/planetscale
PlanetScale CLI를 사용하여 데이터베이스를 생성
pscale database create carrot-market --region ap-northeast
안전하게 암호 없이 컴퓨터와 planetScale 사이에 보안 연결을 만들기
해당 터미널을 닫으면 연결 끊김
Connect Create a secure connection to a database and branch for a local client
pscale connect carrot-market
-컴퓨터와 planetSclae 사이에 보안 tunnel 만듬
schema.prisma 파일은 환경변수에 있는 databse_url 찾음
Prisma를 통한 MySQL 데이터베이스 서버에 연결
ex) mysql://USER:PASSWORD@HOST:PORT/DATABASE
https://www.prisma.io/docs/concepts/database-connectors/mysql
MySQL database connector (Reference)
This page explains how Prisma can connect to a MySQL database using the MySQL database connector.
www.prisma.io
.env에 DATABASE_URL 변경
DATABASE_URL="postsql~~."
DATABASE_URL="mysql://127.0.0.1:3306/carrot-market"
IP 주소 127.0.0.1은 localhost 또는 루프백 주소 라고하는 특수 목적의 IPv4 주소 입니다.
Vitess는 foreign key constraint를 지원하지 않음 (일반적인 MySQL, PostgresQL은 지원함)
Scaling을 위해 데이터를 분산하기 때문
따라서 이 작업은 Prisma에서 수행
오류 없이작동함
데이터베이스가 도움을 주지 못하는 부분에서
prisma에서 도움을 받자
Preview feature "referentialIntegrity" is deprecated. The functionality can be used without specifying it as a preview feature.
The `referentialIntegrity` attribute is deprecated. Please use `relationMode` instead. Learn more at https://pris.ly/d/relation-mode
라고 나와서
generator client {
provider = "prisma-client-js"
}
datasource db {
provider = "mysql"
url = env("DATABASE_URL")
relationMode = "prisma"
}
로 변경했어요
previewFeatures = ["referentaiIntegrity"]
하면 노란줄로 Preview feature "referentialIntegrity" is deprecated. 라고 안내 됩니다.
찾아보니 요즘 버전에서는
previewFeatures = ["referentaiIntegrity"] 대신에
relationMode = "prisma" 를 적용할수 있을것 같습니다. (아직안해봤어요 ㅠ)
-참고
The ability to set the relation mode was introduced as part of the referentialIntegrity preview feature in Prisma version 3.1.1, and is generally available in Prisma versions 4.8.0 and later.
The relationMode field was renamed in Prisma version 4.5.0, and was previously named referentialIntegrity.
`npx prisma db push` 를 통해 Prisma client 생성
Admin Pannel에 모델이 SQL로 잘 생성되었음 (prisma가 번역해준것)
npx prisma db push
db push
db push는 Prisma Migrate와 동일한 엔진을 사용하여 Prisma 스키마를 데이터베이스 스키마와 동기화하며 스키마 프로토타이핑에 가장 적합합니다.
npx prisma db push
https://www.prisma.io/docs/concepts/components/prisma-migrate/db-push
Prototype your schema
Prototype your schema
www.prisma.io
Prisma Client
TypeScript 및 Node.js용 직관적인 데이터베이스 클라이언트
Prisma Client는 생각하는 방식으로 구성하고 앱에 맞춤화된 유형으로 Prisma 스키마에서 자동 생성되는 쿼리 빌더입니다.
npm install @prisma/client
```
import { PrismaClient } from '@prisma/client'
const prisma = new PrismaClient()
```
https://www.prisma.io/docs/concepts/components/prisma-client
Prisma Client
Prisma Client is an auto-generated, type-safe query builder generated based on the models and attributes of your Prisma schema.
www.prisma.io
client.ts 는 당연하게도 front에서 import하여 사용할 수 없음 (보안에 심각한 문제)
따라서 front(브라우져)가 아닌 서버가 필요
pages 경로에 api 폴더를 생성함으로써 api서버가 생성됨
connection 핸들러 함수를 export defualt해주면 됨
in client.ts
```jsx
import { PrismaClient } from 'prisma/prisma-client';
export default new PrismaClient();
```
in api/client-test.tsx
```jsx
import { NextApiRequest, NextApiResponse } from 'next';
import client from '../../libs/client';
export default async function handler(
req: NextApiRequest,
res: NextApiResponse
) {
await client.user.create({
data: {
name: 'test',
email: 'song',
},
});
res.json({
ok: true,
});
}
```
API Routes
API route는 Next.js로 API를 빌드하기 위한 솔루션을 제공합니다. pages/api 폴더 내의 모든 파일은 /api/*에 매핑되며 API endpoint로 처리됩니다. server-side 전용 번들이며 client-side 번들 크기를 늘리지 않습니다.
req: http.IncomingMessage의 인스턴스와 pre-built된 일부 미들웨어
res: http.ServerResponse의 인스턴스와 일부 helper함수
예를 들어 다음 API 경로 pages/api/user.js는 상태 코드가 200인 json 응답을 반환합니다.
```
export default function handler(req, res) {
res.status(200).json({ name: 'John Doe' })
}
```
https://nextjs.org/docs/api-routes/introduction
schema.prisma
프리스마 설정을하고 데이터가 어떻게 생겼는지 정의하는 파일
secure tunnel로 planet scale연결해줘야함
pscale connect carrot-market
-->안전하게 연결중인 url받음
>.env에 넣고
npx prisma db push
프리스마가 schema.prisma 파일을 확인해 데이터형태를 planet scale로 보냄
프리스마가 앱에 있는 데이터를 확인 할 수 있게 도와주는 관리자 패널을 제공 함. (npx prisma studio)
npx prisma generate
어떻게 코드로 데이터베이스에게 말을 걸지 클라이언트 생성해줌
관리자 패널에서는 코드 없이 데이터베이스에게 말을 걸 수 잇음
npm i @prisma/client 설치 후에
libs>clients
nodemodule에서 가져와서 export default new prismaClient()
사용자는 프론트엔드에서 api에 요청을보내기만하면 api가 데이터베이스에 직접 전달
Nextjs는 그자체만으로도 api라우터를 만들 수 있어서 pages >api > 파일추가하면 apiurl이된다.
function은 req,rs객체를 가지는데 이 안에 백엔드 코드에서 실행하게되고 응답은 json 으로 ㅏㄷ게된다.
1. DB push는 prisma의 schema를 planet scale과 연동하기 위한 작업이구요.
2. npx prisma generate는 schema를 기준으로 prisma를 사용하기위한 준비? 작업이요! 또한 schema를 참고하여 ts도 적용해주기때문에 개꿀이구욤.
위 준비가끝나면 PrismaClient에 의해 생성된 객체를 사용할수 있지용.
이것을 우리는 client-test에서 client라는 이름 으로 DB를 제어하고요.
즉 어떤 이유로 node_modules가 삭제 됐다면(또는 다른환경에서 git clone을 했다면) npm install 한다음에 npx prisma generate도 해줘야 해요(아마두)
반대로 npx prisma db push는 스키마가 변경됐을때(DB구조가 변경됐거나 추가될때)사용하는 명령어로 이해했습니다
(아니면 맨처음 DB schema를 생성할때만 사용하는 걸수도 있어요
schema 변경된내용을 나중에 수정하는 명령어가 따로있는지는 아직 doc안읽어봐서 확실하지 않음요 ㅋㅋ)
그리고 schema가 변경됐다면 generate도 다시 실행해줘야하는 분위기인거같슴다.
'코딩 > NextJs' 카테고리의 다른 글
| 당근마켓 :6 Authorization (0) | 2023.04.11 |
|---|---|
| 당근마켓 5 : authentication (0) | 2023.04.03 |
| 당근마켓 4 :Refactoring (0) | 2023.03.30 |
| 당근마켓 2:Tailwind css (0) | 2023.03.17 |
| 당근마켓 :1 NextJs, Tailwind setup (0) | 2023.03.15 |


